The February Daring Bakers’ challenge is hosted by Julie of One-Wall Kitchen. She challenged us to an easy, simple filled bun using no-knead dough.
I am very new to bread baking so this challenge is very important since it will be my first time ever to bake a savoury filled bread. I certainly am no stranger to these type of bread. One of my fondest food memory was having pork adobo roll at a kiosk in my former university. I would eagerly buy one especially if there was a freshly delivered batch. It was a wonderful snack wolfed down with ice cold Coke. Yum!
For the filled bun I make here - I will call them rolls since the word siopao in my native Filipino ears always mean buns that are steamed not baked. I decided on doing an asado filling first. An email to my sister for her asado recipe was duly dispatched because I really don't want to mess this up with an untried recipe. I just tweaked it a little bit and it was the kind of asado I always wanted to make myself.
As for the bread itself, I used Betty Crocker's all-time favourite dinner roll recipe. I will say it again, I am a newbie baker, so forgive me if it came out a little denser than normal. I think I put in too much flour. It did rise quite a bit but I was hoping it would be fluffier. Oh well, maybe I'll give it another go in the coming weeks.
1/4 cup butter - room temperature or melted 1/4 cup sugar 1 package fast-acting or regular dry yeast (2 1/4 tsp) 3 1/2 bread flour 1 large egg - slightly beaten 1/2 cup milk 1/2 cup water extra melted butter for brushing and greasing
Mix the water and milk in a saucepan and heat gently until warm (about 50°C/120°F).
Combine butter, sugar, 2 cups of the bread flour, and yeast in a big bowl.
Add the warm milk mixture and egg into the bowl.
Beat with electrix mixer (or wooden spatula) for about 1 minute until flour mixture is moistened.
With a wooden spatula, add in enough of the flour 1/2 cup at a time until the dough is soft, leaves the side of the bowl and is easy to handle.
Remove the dough from the bowl and place on a floured flat surface. Knead for about 5 minutes, sprinkling more flour on the surface to keep the dough from sticking, until the dough is smooth and springy.
Put dough in a greased bowl, turn so that all sides are greased. Cover with greased plastic. Let rise in a warm place for about 1 hour or until doubled in size.
Punch down dough and turn out on a lightly floured surface. Divide into 15 pieces. Shape each piece into a ball.
Grease a 13 x 9-inch baking pan. Arrange the shaped dough in it and brush with melted butter. Cover with plastic wrap and let rise for about 1 hour or until doubled in size.
Bake in a preheated oven at 190°C/fan 170°C/375°F for 15 minutes or until golden brown.
Remove from pan onto a cooling rack. Brush top with more melted butter.
My pictures are a bit lame but don't let that detract you from the fluffiness and delectable taste of this mashed potato-based bread. I already did a similar one before so I was not a complete newbie when I tried this. The bread machine was deployed for the kneading and initial proofing so it certainly was a breeze to do. As you can see, I was so satisfied with the result. Just look how fluffy they are!
The King Arthur Flour website is where I got the recipe I adapted. They have loads of interesting recipes there that I'd like to try someday.
Amish Dinner Rolls
2 1/4 tsp [1 package] active dry yeast 3/4 cup slightly warm water or potato water* 2 eggs 1 cup unseasoned mashed potato 4 1/4 cups plain flour 1/3 cup sugar 1 1/2 tsp fine sea salt 6 Tbsp butter - room temperature
*Bread Machine Method:
Put all the ingredients in the bread machine according to the instructions of the bread machine manufacturer. Set the machine for the dough program and press start.
Allow the machine to complete its cycle. For most bread machine the rising of the dough is included in the cycle. If not, allow the dough to remain in the machine to rise for for 1 hour or until double in bulk.
*Manual Method:
Dissolve 1 tsp of the sugar in the water. Add the yeast and stir to slightly dissolve. Set aside for 10-15 minutes. By this time, it should foam up to indicate that the yeast is active. If not, discard mixture and start again with a new batch of yeast.
Combine all the dry ingredients in a bowl. Add the rest of the ingredients and mix until the dough starts to leave the side of the bowl.
Turn out the dough onto a lightly greased or floured surface and knead for 6 to 8 minutes or until it's smooth and satiny.
Place the dough in a lightly greased bowl. Turn it to coat all around with grease. Cover with lightly greased plastic wrap and let rise for about 90 minutes or until double in bulk.
*To Shape Rolls:
Punch down dough, turn out onto a floured surface and knead for a few turns until smooth again.
For standalone rolls: divide dough into 16 equal pieces and shape into balls. Place in lightly greased baking sheets leaving about 2 inches of space between them.
For pull-apart rolls: divide dough into 15 equal pieces (I used weighing scale for this). Place in a greased 9 x 13-inch baking pan into 3 rows of 5 balls each. Space them evenly.
Cover with lightly greased plastic wrap and let them rise for about 2 hours. The pull-apart rolls should be touching each other.
*Baking:
Bake in a pre-heated 180°C/fan 160°C/350°F oven for about 20 to 25 minutes or until golden.
Remove from oven and carefully remove from the baking pan.
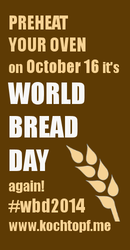
The lovely Zorra of Kochtopf is again hosting the World Bread Day 2014 food blog event. An annual virtual gathering of food bloggers to celebrate anything to do with bread.
For my entry, I'm harking back to the very first bread I ever successfully baked. When I started baking more than two decades ago I got really stressed when baking with yeast (well nowadays I still get a little anxious). I think it's the worry that the dough won't rise that I constantly peek while it is proving. This might have contributed to my first few attempts at bread making to fail. So when I saw the Make-Ahead Potato Bread Rolls in my beloved hardbound Betty Crocker cookbook, I lost no time in trying it. See, in that recipe the rising is not done in a warm place but in the fridge - overnight! How great is that? No more stressing, hand wringing and peeking to see if the dough rose at all. Anyway, the bake was successful but I never got to bake that bread again until now more than 25 years later.
One thing I only remembered now is that the shaping of the dough into balls can be a bit hard. They would not follow easily the shape I want. Maybe I should let it come to room temperature first before shaping? I'll find out next time. There's also one thing I remembered - how delicious it is especially when warmed. My youngest daughter loved it so much she slathered it with strawberry jam - one of the few times I saw her do that. This is a definite keeper of a recipe.
Potato Bread Rolls
1 package [2 1/4 tsp] active dry yeast 1 1/2 cups warm water 2/3 cup sugar 1 cup unseasoned mashed potato 2 eggs 1 1/2 tsp fine sea salt 2/3 cup butter - softened 7 - 7 1/2 cups plain flour
In a bowl, dissolve the yeast in the warm water together with 2 tsp of the sugar. Set aside. It should foam and bubble after 10 minutes. If it did not, this means the yeast is dead so discard the mixture and start again with a new batch of yeast.
Add the sugar, potatoes, eggs, butter, salt and 3 cups of the flour. Mix with electric mixer on low speed until smooth.
Add in enough of the rest of the flour to make the dough easy to handle. Knead on a floured surface for about 5 minutes of until smooth and springy.
Grease a bowl and place dough in it. Turn dough to grease all over. Cover tightly with cling film and let rise in the fridge for at least 8 hours but not more than 5 days.
Punch dough gently and knead for a few turns. Divide dough into 2 equal pieces for loaf and 4 equal pieces for rolls.
*For small dinner rolls:
Shape dough into 1 1/2 inch balls. Arrange on a greased baking sheet 1 inch apart. Cover and let rise in a warm place until double (about 1-2 hours).
Brush with melted butter or egg wash (beaten egg with 1 Tbsp water or milk).
Bake in an oven preheated to 200°C/fan 180°C/400°F for 15-20 minutes.
*For clover leaf rolls:
Grease muffin pans. Shape into 2-inch balls and put in the muffin pans. Using scissors, cut balls into halves and then into fourths.
Brush with melted butter and let rise in a warm place until double (1-2 hours).
Bake in an oven preheated to 200°C/fan 180°C/400°F for 15 minutes.
The August Daring Bakers' Challenge took us for a spin! Swathi of Zesty South Indian Kitchen taught us to make rolled pastries inspired by Kurtoskalacs, a traditional Hungarian wedding pastry. These tasty yeasted delights gave us lots to celebrate!
Actually, the challenge was to do either the kurtoskalacs or the ensaymada. Naturally, I chose ensaymada - the Filipino version that is. This recipe from my sister-in-law (Ate Eva) has been in my to-do list for years! I finally had a good kick in the butt to do it.
The ensaymada of my childhood were very much like the original Spanish version. They were coiled flat and more flaky with lard often used for this purpose. Sometimes there were nuggets of raisins in it that were like little oasis of delight in my juvenile mouth. Yum! Nowadays, the modern Filipino ensaymada are more brioche-like. In fact some of them are so rich they resemble cakes more than a pastry. Nevertheless, they are equally wonderful and great as a midday snack. As with most things in Filipino food, the modern ensaymada combines the buttery sweet taste of the butter-sugar topping with the saltiness of the grated cheese so you get that familiar salty-sweet flavour with the soft pillow-like pastry.
This recipe is indeed a challenge for me. I am not very experienced with pastry so when the dough came out very very sticky after the first rising, it took me a looong time to get it to a manageable state with all the kneading and adding of more flour. In the end it was still sticky but did not cling too much when handled. I think I'll reduce the liquid a lot the next time I bake this. This particular recipe is not the 'special' ensaymada variety they call in the Philippines. That one has *a lot* of eggs and butter which make it more cake-like and quite rich. Ate Eva's is less rich and more bread-like. As a matter of fact, when I tasted the finished product bare without any toppings I thought it was okayish. But when you combine it with slathered soft butter, sugar, and grated cheese on top it was great! Exactly what I intended to make.
As a note to myself, this is the actual recipe from my SIL (with some adjustments in some ingredients and more elaborate procedure steps). And it makes a ton of ensaymada! It roughly makes about 30 medium-sized ensaymada and probably double that for the muffin-sized ones. In which case I believe this can be done with just a third of the recipe if only to keep me from eating ensaymadas for weeks! The freezer is my friend now.
Ensaymada
*Yeast mixture: 3/4 cup lukewarm water 3 tsp dry active yeast 1 tsp sugar
*Topping: butter - softened to room temperature granulated sugar grated cheddar cheese or edam
Mix the yeast mixture in a small bowl, cover and set aside. After about 15 minutes it should start to foam. If it didn't that means your yeast is probably old. In that case, throw away the mixture and start again. If you are using instant, rapid-action, or fast-action dry yeast you can skip this step and add the yeast and sugar directly with the flour and the water with the other wet ingredients.
Combine the flour with the sugar in a large bowl.
In separate bowl, mix the melted butter, egg yolks, and vanilla.
Add in the milk. Mix well.
With a wooden spoon or with a mixer on low speed, stir in the milk mixture and the yeast mixture into the flour mixture. Combine well.
Add in the cooking oil and mix until well combined.
Cover and let it rest to rise in a warm area for about 1 hour or until double the size.
Punch down dough and turn out onto a well-floured surface.
Knead the dough while adding more flour. In the end it should be soft and sticky but should come away from fingers when kneading.
Prepare the baking moulds by brushing the bottom and sides with softened butter.
Divide into portions - 75-80 g for medium-sized ensaymada and 25-30 g for small ones.
On a greased surface, roll out each portion thin into a rectangle shape and brush generously with softened butter or with your choice of fillings - cheese, chocolate, ham, etc.
Roll portion from the long side into a thin log (about 1/2-inch or less in diameter).
Coil the rolled dough into a spiral shape inside the prepared moulds taking care to tuck in the outer end.
Cover loosely with tea towel and let rest at room temperature for 1-2 hours. They will double in size again.
Bake in a preheated oven at 180°C/fan 160°C/350°F for about 18-20 minutes for medium-sized ensaymada.
Cool completely on a wire rack.
Put toppings - slather softened butter then press top onto a small bowl full of sugar then sprinkle grated cheese on top.
The August Daring Bakers' Challenge took us for a spin! Swathi of Zesty South Indian Kitchen taught us to make rolled pastries inspired by Kurtoskalacs, a traditional Hungarian wedding pastry. These tasty yeasted delights gave us lots to celebrate!
Actually, the challenge was to do either the kurtoskalacs or the ensaymada. Naturally, I chose ensaymada - the Filipino version that is. This recipe from my sister-in-law (Ate Eva) has been in my to-do list for years! I finally had a kick in the ass to do it.
The ensaymada of my childhood were very much like the original Spanish version. They were coiled flat and more flaky with lard often used for this purpose. Sometimes there were nuggets of raisins in it that were like little oasis of delight in my juvenile mouth. Yum! Nowadays, the modern Filipino ensaymada are more brioche-like. In fact some of them are so rich they resemble cakes more than a pastry. Nevertheless, they are equally wonderful and great as a midday snack. As with most things in Filipino food, the modern ensaymada combines the buttery sweet taste of the butter-sugar topping with the saltiness of the grated cheese so you get that familiar salty-sweet flavour with the soft pillow-like pastry.
This recipe is indeed a challenge for me. I am not very experienced with pastry so when the dough came out very very sticky after the first rising, it took me a looong time to get it to a manageable state with all the kneading and adding of more flour. In the end it was still sticky but did not cling too much when handled. I think I'll reduce the liquid a lot the next time I bake this. This particular recipe is not the 'special' ensaymada variety they call in the Philippines. That one has *a lot* of eggs and butter which make it more cake-like and quite rich. Ate Eva's is less rich and more bread-like. As a matter of fact, when I tasted the finished product bare without any toppings I thought it was okayish. But when you combine it with slathered soft butter, sugar, and grated cheese on top it was great! Exactly what I intended to make.
As a note to myself, this is the actual recipe from my SIL (with some adjustments in some ingredients and more elaborate procedure steps). And it makes a ton of ensaymada! It roughtly makes about 30 medium-sized ensaymada and probably double that for the muffin-sized ones. In which case I believe this can be done with just a third of the recipe. If only to keep me from eating ensaymadas for weeks! The freezer is my friend now.
Ensaymada
*Yeast mixture: 3/4 cup lukewarm water 3 tsp dry active yeast 1 tsp sugar
*Topping: butter - softened to room temperature granulated sugar grated cheddar cheese or edam
Mix the yeast mixture in a small bowl, cover and set aside. After about 15 minutes it should start to foam. If it didn't that means your yeast is probably old. In that case, throw away the mixture and start again. If you are using instant, rapid-action, or fast-action dry yeast you can skip this step and add the yeast and sugar directly with the flour and the water with the other wet ingredients.
Combine the flour with the sugar in a large bowl.
In separate bowl, mix the melted butter, egg yolks, and vanilla.
Add in the milk. Mix well.
With a wooden spoon or with a mixer on low speed, stir in the milk mixture and the yeast mixture into the flour mixture. Combine well.
Add in the cooking oil and mix until well combined.
Cover and let it rest to rise in a warm area for about 1 hour or until double the size.
Punch down dough and turn out onto a well-floured surface.
Knead the dough while adding more flour. In the end it should be soft and sticky but should come away from fingers when kneading.
Prepare the baking moulds by brushing the bottom and sides with softened butter.
Divide into portions - 75-80 g for medium-sized ensaymada and 25-30 g for small ones.
On a greased surface, roll out each portion thin into a rectangle shape and brush generously with softened butter or with your choice of fillings - cheese, chocolate, ham, etc.
Roll portion from the long side into a thin log (about 1/2-inch or less in diameter).
Coil the rolled dough into a spiral shape inside the prepared moulds taking care to tuck in the outer end.
Cover loosely with tea towel and let rest at room temperature for 1-2 hours. They will double in size again.
Bake in a preheated oven at 180°C/fan 160°C/350°F for about 18-20 minutes for medium-sized ensaymada.
Cool completely on a wire rack.
Put toppings - slather softened butter then press top onto a small bowl full of sugar then sprinkle grated cheese on top.