Apple Aperture reaches the end of the road

Earlier this month, Apple announced the upcoming version of their operating system, OS X Yosemite, during this year’s WWDC. And with it comes the sad news that the company’s “pro” photo-editing suite called Aperture will no longer receive updates.

According to the Apple spokesperson that our source talked to, the decision to abandon Aperture is brought forth by the new Photos and iCloud apps pre-installed on the OS X 10.10, the former being the replacement to the iPhoto.

In line with this, Apple will aid Aperture users in migrating their album/s from the now-defunct software to the new Photos app once Yosemite is released. The company also stated that they’ll also help Mac users to transition to Adobe Lightroom should they wish to go down that path.

The good news is that Apple is not totally axing the software. This means that Mac users can still use Aperture even after upgrading to Yosemite, provided of course they can live without the updates.

{Source}

The post Apple Aperture reaches the end of the road appeared first on YugaTech | Philippines, Tech News & Reviews.

Exposure 101: Working with light

One of the key elements of photography is working with light and getting just the right amount of it so your pictures end up visually appealing. In this segment, we’ll give you an introduction on exposure and how each of its facets affects your composition.

By definition, Exposure is the amount of light (natural or artificial) that a camera’s sensor (or film) is exposed to. Therefore, depending on how much light was allowed to hit the sensor, an image can be underexposed (dark) or overexposed (bright).

exposure

Exposure can be altered to meet the envisioned outcome of the user. This is done by adjusting key photography elements whether in-camera (ISO and Shutter speed) or off-camera (Aperture). We’ll discuss each of these aspects as we go along, starting with Aperture.

Aperture

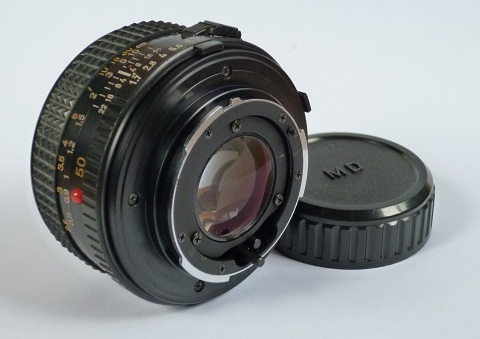
In layman’s term, Aperture is described as the opening of the lens mechanically controlled by several blades which restricts the amount of light that hits the sensor. It works similarly to our eye’s pupil; it dilates or contracts to compensate for the intensity of the light.

aperture

Aperture is measured in f-stop which is somewhat confusing particularly to those who are starting out in photography. A lower number (ex. f/1.8) denotes a larger lens opening which subjects the lens (and the sensor in the process) to more light. On the other hand, a higher number like f/8 translates to a smaller opening.

Depth of field is also a topic of discussion when dealing with aperture. Wikipedia defines it as “the distance between the nearest and farthest objects in a scene that appears acceptably sharp in an image.” In context, DOF deals with the amount of emphasis that a given focus point has in the image as opposed to the foreground/background.

aperture comparison

DOF is categorized in to two; shallow and deep. The former is achieved by either shooting at a wider aperture or by moving the subject as far away as possible from the background. As a result, you’re drawing more emphasis to the main subject by blurring background/foreground.

Conversely, if you want the other portions of the image to be as defined as the subject as possible, you can either move the main subject (Teddy) closer to the background (Paul Frank) or shoot at a smaller aperture like what we did on the right-most picture.

Shutter Speed

If Aperture controls how much light comes in, then Shutter Speed dictates the amount of time that the film or sensor is exposed to the light. Shutter speed is measure in seconds which correlates to the time it takes for the whole cycle (opening and closing of the shutter) to complete.

shutter speed

In practice, the sensor/film records all the light, as well as movements, from the time that the shutter opens until it closes. This means that by shooting at faster shutter speed (half a second or faster) you’re actually letting in less light as opposed to having the shutter open for a second or longer.

sample

Oftentimes, shutter speed is set to less than a second in order to freeze a moment and/or avoid motion blur caused by either unsteady hands during handheld shooting or moving subjects. This “motion blur” is evident on the image above that I took while I was on a moving bus.

There are, however, some instances where a slower shutter speed is required to produce the desired result (as seen in the image below) or what is commonly called as long exposure. With the help of a tripod and an ND Filter, I was able to capture a flowing stream and made the water look creamy or cloud-like.

long exposure

ISO
Lastly we have ISO, or previously known as DIN and/or ASA back in the days of film cameras. In a nutshell, ISO deals with the sensitivity of sensor or film to light.

Before the advent of digital cameras, the ISO cannot be adjusted in the camera; rather it’s pre-set on the film that you’re using. Fortunately, we won’t have to deal with that anymore as digital cameras are now equipped with various ISO presets that are readily available at your disposal.

ISO comparison

Compared to the two previous settings, ISO is a little less complicated to understand. Jargons aside, a lower ISO value (typically 100) means that the image sensor is less susceptible to light. As the ISO value increases, the more that the image sensor is sensitive to light, thus producing a brighter picture.

However, the drawback of shooting at a higher ISO value is that the resulting image may suffer from noise due to the size of the sensor and/or its inability to handle noise at high ISO settings. This is exactly the reason why most photographers shoot at base ISO or the lowest possible value for their camera to yield the crispest possible result.

Conclusion

Whether you wield a dSLR camera or not, having a clear understanding of exposure (and each of its facets) can help improve not only your photography skills, but also the quality of your pictures. And now that you have a better grasp on how each setting affects your composition, all that’s left for you to do is to try it out with your camera and experiment by going Manual.

We’ll end this basic tutorial with some tips and tricks to improve your shot through proper exposure.

• There’s no correct exposure. You can have a slightly over or underexposed picture as longs as it’s visually appealing to you.
• Use your camera’s light meter if it has one, it’ll help you get the proper exposure.
• Shoot at the lowest possible ISO. If it’s inevitable for you to increase the ISO, try not to go beyond 1600.
• Depending on the lens that you’re shooting with, it’s best if you shoot at an aperture that’s one or two stops down. Example, if you’re lens is a 50mm f/1.8, setting the aperture at f/2.8 or even f/4 will yield better result.
• For handheld shooting, try not to go below 1/20 shutter speed as to not cause motion blur.
• Invest on a good tripod, it’ll give you more leeway on using slower shutter speed and allow you to take long exposure shots.

Finally, here’s a cool cheat sheet courtesy of the folks over at Living in the Stills that pretty much sums up what we’ve discussed.

exposure cheat sheet

Louie Diangson contributed to this post.

The post Exposure 101: Working with light appeared first on YugaTech | Philippines, Tech News & Reviews.

Beginner’s Guide to Camera Lenses

Having a good set of lens is as equally important, if not more important, as having a good camera body. As such, it is important to know some of the different kinds of lenses, some of its basic features, and why pro photographers invest heavily on good optics.

lenses

The “brain-eye” analogy is the simplest life-like explanation that I can think of as to why photographers are bit picky with their lenses. Think of the camera body as our brain and the lens is our eyes. The amount of details and accuracy of a certain object depends on our eye’s ability to perceive it. Therefore, a photographer will only be able to truly harness his camera’s prowess if it’s paired to an equally-capable optics.

Types

Camera lenses are classified in many different categories (focal length, AF performance, etc.), but the most common of the lot is focal length which divides the lens in to two major groups –the Prime and Zoom lenses.

prime lens

Prime lenses or commonly known as Primes are characterized by a fixed focal length (measured in mm or millimeter in photography). Often times, Primes possess a fast aperture (denoted by a lower F number which means bigger lens opening) which makes it a popular choice among photography aficionados as it allows them to compose shots with nice Bokeh (shallow depth of field, blur).

Another thing that shutterbugs love about primes is its size. Most prime lenses, especially those with double-digit focal length (28, 35 or 50mm), have a compact design which lessens some of the burden that’s brought by their big ass dSLR cameras. Some of these Prime lenses are also called Pancake lens because of short and almost flat body.

Zoom lenses, on the other hand, are the complete opposite of Primes as it has variable focal lengths. Because of its zooming properties, photographers can close in on a subject while still keeping the same distance; a feat that would otherwise be impossible when using a prime lens without physically moving closer to the subject.

zoom lens

One of the tradeoff of most zoom lens is aperture. As you zoom in, the lens’ opening narrows which lessens the amount of light coming in to the camera sensor, resulting to an underexposed (darker) image. As such, it forces the photographer to compensate for the slow aperture by slowing down the shutter speed and increasing the ISO which can sometime lead to a bad photo due to noise and blurring.

It’s worth noting that not all zoom lenses are slow and not all primes are fast. There are zoom lenses with fixed opening, meaning the aperture remains constant even on the telephoto end (longest focal distance of the zoom) and there are prime lenses that have a relatively narrow opening especially those with 200mm and above focal length. The next segment of this article will give you more insight about Aperture of a lens.

Aperture

A lens maximum aperture (widest opening which denotes a lower number) is probably the single most significant feature of a lens that oftentimes dictates its price. This explains why a Prime lens with an f-stop (another term for aperture) lower than 1.8 and zoom lens with a fix aperture equivalent or less than f/2.8 costs a fortune.

fast zoom

The reason why these lenses are expensive is because constructing a fast lens isn’t exactly a walk in the park for lens manufacturers. It requires a great deal of imaging know-how and some top of the line materials to produce a high-end lens. Now, I’m not gonna go in to the technicalities of constructing a fast lens, but if you feel the need to know more about it, you’ll find plenty of information about lens construction around the web.

Focusing

In the past, when film cameras were still at the top of the food chain, lenses only have manual focus. Nowadays, almost all of the lenses currently in production are already equipped with a built-in motor that makes autofocusing possible. The option to manually focus is still there, but is often times disregarded as autofocus is most of the time more reliable in getting the focus right.

focus

Although most of modern-day lenses have an autofocus feature, some lenses, especially the high-end ones, are equipped with a better motor that cuts the amount of time for it to focus and the noise it emits when it does. All lens manufacturers have a different term for such feature (as seen above), but it’s pretty much does the same trick.

Lens Mount

Wikipedia defines lens mount as “an interface — mechanical and often also electrical — between a photographic camera body and a lens.” In a less technical term, it’s basically the portion of the camera that comes in contact with the rear end of the lens and where it’s being locked in place.

mount

Lens manufacturers, particularly those who also manufacture camera bodies, have their own proprietary lens mount designed specifically for their lenses. Hence, a lens from a camera maker will most likely not fit a camera body made by a different manufacturer unless a lens adapter (if such exist) is used. Which is why third-party lens providers, like Sigma and Tamron, create a lens in different lens mounts in order to cater to different camera bodies.

Image Stabilization

Commonly known as IS, image stabilization is an added feature of the lens that reduces the possibility of getting an image blurred because of a slow shutter speed. This feature can be turned on or off through a switch that’s usually located at the side of the lens.

Summary

There you go, those are some of the basic things you need to know about lenses. Here’s a quick recap of the things we’ve discussed earlier:

• Primes have a fixed focal length while zoom lenses have variable focal length.
• Fast lenses are generally more expensive than lenses with narrow opening.
• Some lenses have special motor for faster and quieter autofocusing which adds to the total price of the lens.
• Lens mount dictates the compatibility of a lens to a camera body. Make sure to check the lens mount first before you purchase a lens.

To cap things off, we’ve prepared a short video to give you more insight on the different external parts of a lens, what are the various markings on the lens and what it stands for. Hope you enjoyed the post!

The post Beginner’s Guide to Camera Lenses appeared first on YugaTech | Philippines, Tech News & Reviews.