AMD has always been known as a cheaper alternative when buying PC components compared to Intel and Nvidia. Their latest RX-480 graphics card costs only $200 (ironically Php14,000 here) and is a beast at 1080p gaming that’s also VR Ready. An extremely well known company, we are eager to see what graphics card would AMD throw against the 1080 since the RX-480 is only a match for the GTX 1060 and doesn’t even go near a GTX 1070 in terms of performance.
You can never go wrong with the RX-480 considering its price tag. It is a definite must have for those who are on a budget and wants to have a smooth 1080p gaming experience that is also VR Ready. Many people have been asking for a build guide within Php30k that utilizes AMD’s latest GPU. This is where this build comes in. In the near future we will be updating our guides once the RX-470 and RX-460 are released.
Below is our Php30,000 AMD PC Gaming Build Guide 2016. We have provided two different builds and I’ll be explaining the performance of each build and a recap on what build is for you. As I’ve mentioned we will be utilizing the RX-480 in one of our builds here.
Build 1:
| Part | Name | Price |
|---|---|---|
| CPU: | AMD Vishera FX-8350 4.0GHz | 8,650 |
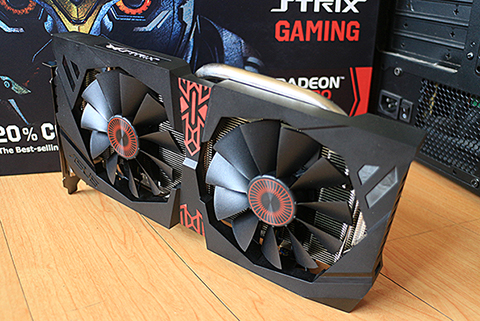
| GPU: | Sapphire NITRO R9-380 Dual-X OC 2GB GDDR5 | 9,890 |
| MOBO: | Gigabyte GA-970A-DS3P | 4,150 |
| RAM: | Gskill RipjawsX 8GB (4×2) 2133 CL9 | 2,620 |
| HDD: | Seagate 1TB 7200RPM ST1000DM003 | 2,450 |
| SSD: | N/A | N/A |
| PSU: | Corsair VS550 | 2,190 |
| CASE: | Tecware Infinity | 1,240 |
PRICE: PHP31,190
The FX-8350 is still an extremely affordable and efficient processor. Despite being 2 years old, the processor still packs a punch because of its 8-core structure accompanied with a very fast clock speed of 4.0Ghz. This means you wont have to worry about mere bottlenecks especially if you’ll be playing small or casual competitive games such as Dota 2 and CS:GO.
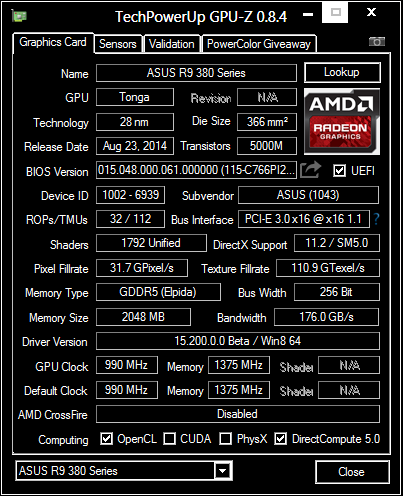
For the graphics card we used the Sapphire NITRO R9-380 Dual X OC Edition. The R9-380 itself is already a grand card capable of playing AAA games in high settings at 1080p with decent framerates. Its not as powerful as Nvidia’s newer Pascal graphics card line or the RX-480, but considering our budget and since its Php4,000 cheaper, it’s still a good option.
If you have a slightly bigger budget, go for the 4GB version of the r9-380. The extra 2GB of RAM will do great when playing games with large texture files. Below are videos of the R9-380’s performance.
GTA V
Dark Souls 3
Tom Clancy’s The Division
Battlefield 4
Rise of the Tomb Raider
Build 2:
| Part | Name | Price |
|---|---|---|
| CPU: | AMD Vishera FX-8320E 3.50GHz 8-Core | 6,390 |
| GPU: | Sapphire RX 480 8GB GDDR5 | 13,800 |
| MOBO: | ASRock N68C-GS4 FX | 2,350 |
| RAM: | Corsair 8GB DDR3 1600Mhz | 1,850 |
| HDD: | Seagate 1TB 7200RPM ST1000DM003 | 2,450 |
| SSD: | N/A | N/A |
| PSU: | Corsair VS550 | 2,190 |
| CASE: | Tecware Infinity | 1,240 |
PRICE: PHP30,270
The energy efficient baby brother of the FX-8350, the FX-8320E is an efficient 8-core processor running at 3.50Ghz. It is a tad slower than the FX-8350, but it is also cheaper and more power efficient. We partnered it with Sapphire’s RX 480 graphics card. Unlike the other build, we have a slower RAM due to a much cheaper motherboard to make way for the RX-480, but is sufficient enough for gaming. You won’t notice much of difference in RAM speed either way.
The FX-8320E will most likely bottleneck the card if the game is CPU extensive. Other than that, you can expect this build to run selected AAA games at High/Ultra Settings in 1080p and mixed settings at 1440p with good framerates. Below are videos of the RX-480’s performance.
The Witcher 3
Batman: Arkham Knight
Tom Clancy’s Rainbox Six Seige
Need for Speed 2015
Just Cause 3
Bottomline:
With Php30,000 you could buy yourself a decent rig that’s capable of playing any game today with decent framerates. While of course you should expect performance to degrade as years pass by due to technological advancements, with this guide we assure you that you will give you a decent gaming experience as of now.
Between the two builds I would prefer the first one due to its better motherboard, faster ram, and the R9-380 is actually sufficient enough for gaming. If you have a higher budget, even if its just Php5,000 more, choose the first build then buy yourself an RX-480. The advantage of the secondbuild compared to the first one is gaming performance out of the box thanks to the RX-480.
If you’re not sure which build to choose, here we state the differences and the advantages of each build.
- Build 1 – FX-8350 and an R9-380
- Best build between the two for long term upgrade. The build has better parts in almost every aspect compared to the second one.
- Faster CPU but weaker GPU. The FX-8350 is stronger than the 8320e, but since the R9-380 is weaker than the RX-480, gaming performance will have a massive difference.
- Choose this build if you plan on upgrading in the future. Just buy a new graphics card, or if you have a bit more money to spend, just buy an RX-480 instantly and you’ll get a significantly better performance than the second one.
- Build 2 – FX-8320E and an RX-480
- Only suitable for those who have little to no plans on upgrading, the FX-8320E whilst good, will bottleneck higher end cards much more than the FX-8350.
- Gaming performance is significantly better than build 1, though with the cost of parts. This build has a cheaper motherboard, slower ram, and slower processor to make room for the RX-480.
- Choose this build if you have little to no plans on upgrading. This is intended for those who wants to game out of the box at high settings in 1080p and even capable of 1440p thanks to the RX-480.
All in all with Php30,000 you could buy yourself a good rig that is VR Ready (R9-380 not VR ready though is capable in playing some VR Games based on experience). If you’re planning for a long term upgrade, go with the first build. But if you intend to max out everything at 1080p and have little plans on buying parts in the future, go with the second one. All in all, he hope this guide gives you an insight as to what your Php30,000 can do.
Are you looking for a cheaper rig? or a new laptop? Check out our:
- Php10,000 Brand New Build Guide 2016
- Php10,000 Secondhand Build Guide 2016
- Php10,000 Hybrid Build Guide 2016 (Brand new and old components)
- Laptops around Php30,000
We will be posting an Intel build sometime in the future.
The post Php30,000 AMD Gaming Build Guide – 2016 appeared first on YugaTech | Philippines News & Tech Reviews.